
What are your photographs saying?
A good photograph is not just a record of a person, place, or thing. A good photograph is a record of a feeling. A great photograph is a creation of a feeling! Any photograph that is being shared with someone should convey a message, but you have to know the message you want to convey when you set up (or edit) your shot!
By conveying a message, you make your photo a work of art. Imagine it enlarged and hanging in a gallery... what would the visitors say about it? What do you want them to say? What is your purpose in this photograph? First answer those questions, and then you are ready to go!
Here are some ideas on ways to imbed meaning, depth, and emotion into your photographs!
Hectic/busy/rushed : BLUR. The best way to take a good blurred photo (yes there is such a thing!) is to use a support so that all movement comes from the subject, not your camera itself! If you don't have access to a mono- or tripod try bracing against something such as a wall or tree, or putting the camera on a reasonably flat surface like the hood of a car. Force the camera to have a shutter speed of greater than 1/60 (the longer the shutter is open the better the blur effect). If you are unable to control the shutter speed, another method would be to change your aperature, or how large the camera is opening the lens. The easiest method to do this is choose the landscape setting on your camera. Essentially, the larger the F stop (this number typically ranges from about 4.5 to 32) the longer your lens will be open to allow enough light for the camera to take a photo with the greatest amount in focus. This trick, though, doesn't work as well in bright light because the shutter will still close fairly quickly! Other ways to manipulate the shutter speed include telling your camera you are using a lower speed film, actually using a lower speed film (this can result in simply darker or grainier looking photos in most cases though!), or intentionally darkening your setting and not firing with flash. Your best bet is to try the first methods first, as the later ones have less reliable results!
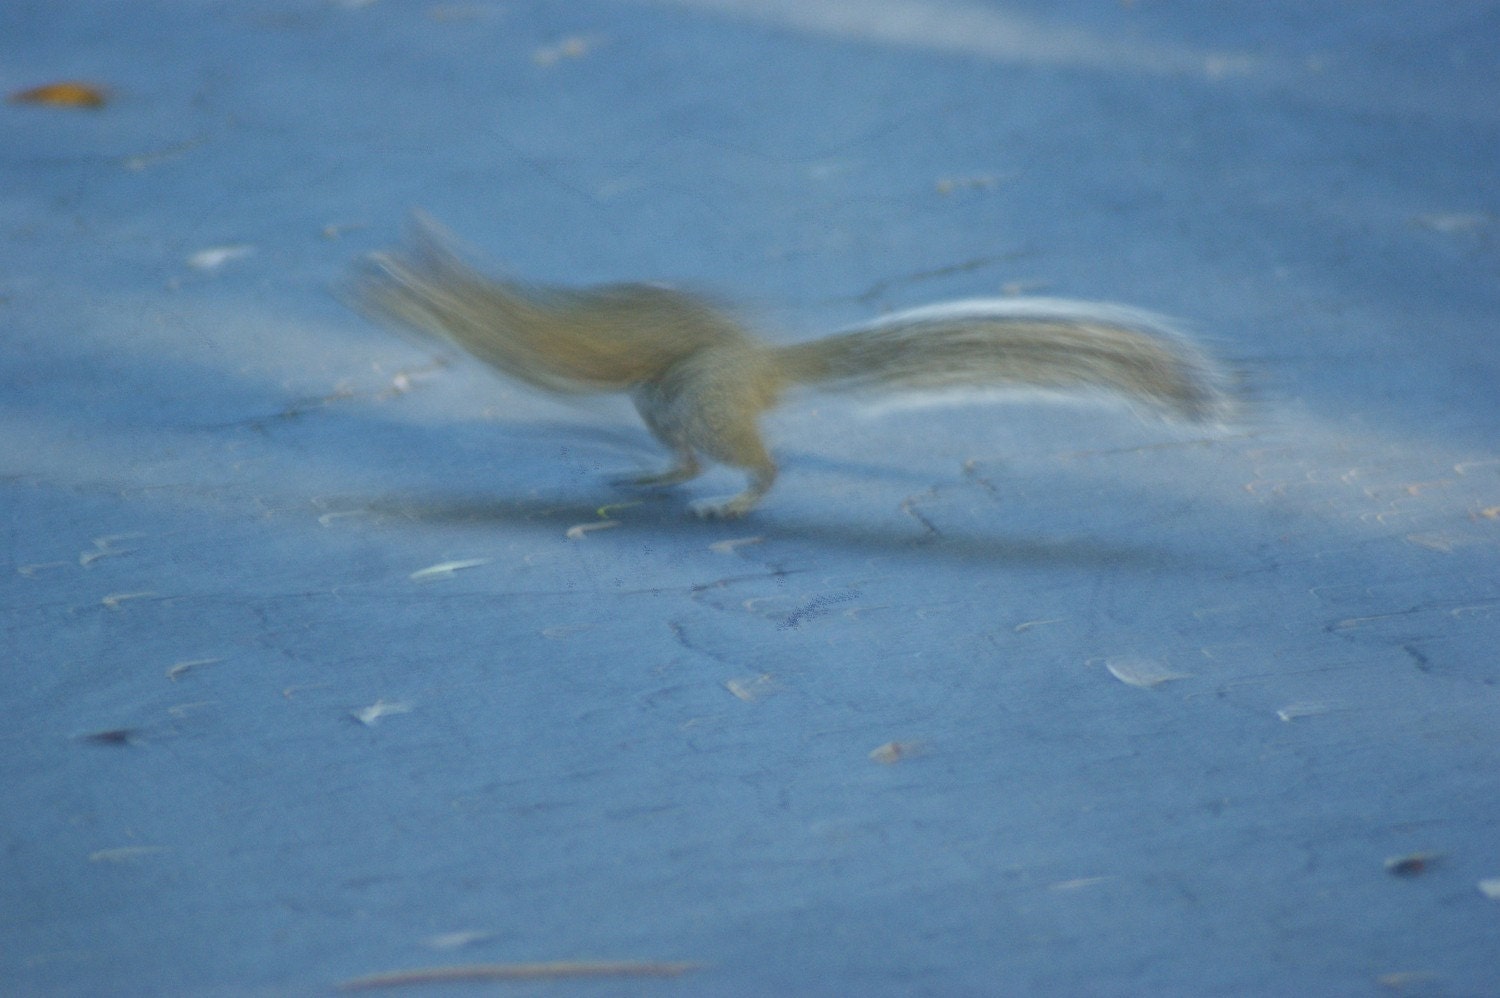
I shot this without a tripod or support because I quite frankly hadn't planned on the shot. That tends to be how it happens! Fortunately the squirrel was in a hurry, so I didn't have to have the shutter open too long to get the effect!
Warmth/comfort/cozy: Yellow/orange hues! What is the warmest thing in the solar system? The sun! Adding the sun's colors to your photo will subconsciously add warmth to any photo! Think of a crackling fire and that glow it emits. The trick is not to add orange or yellow items or material, simply to increase the yellow balance! You could take the photo with extra sunlight on the subject matter, but that could actually wash your photo out more than help! Artificial lighting often registers as a yellow tint in photography, so one method would be to take the photo indoors and to NOT use your flash. Firing the flash will counteract the effect! This means for this method you definitely need a support or steady hands, as without the flash the shutter will be open longer and may result in a blurry photo! The most surefire suggestion is to take the photo as you would any other time, and create the warmth in the editing room! If you are editing a digital image on GIMP or Photoshop, use the color balance tool to increase the yellow (also decreasing blue) and depending on your likes and the lighting/colors possibly also increase some red (decreasing cyan). If this is a film image, ask the processor to do the same when printing. If they don't know what you mean or simply won't do it, you need a different photo lab! Even a hour lab has the equipment to do it, and it takes only an extra moment (if that much) of the processor's time!
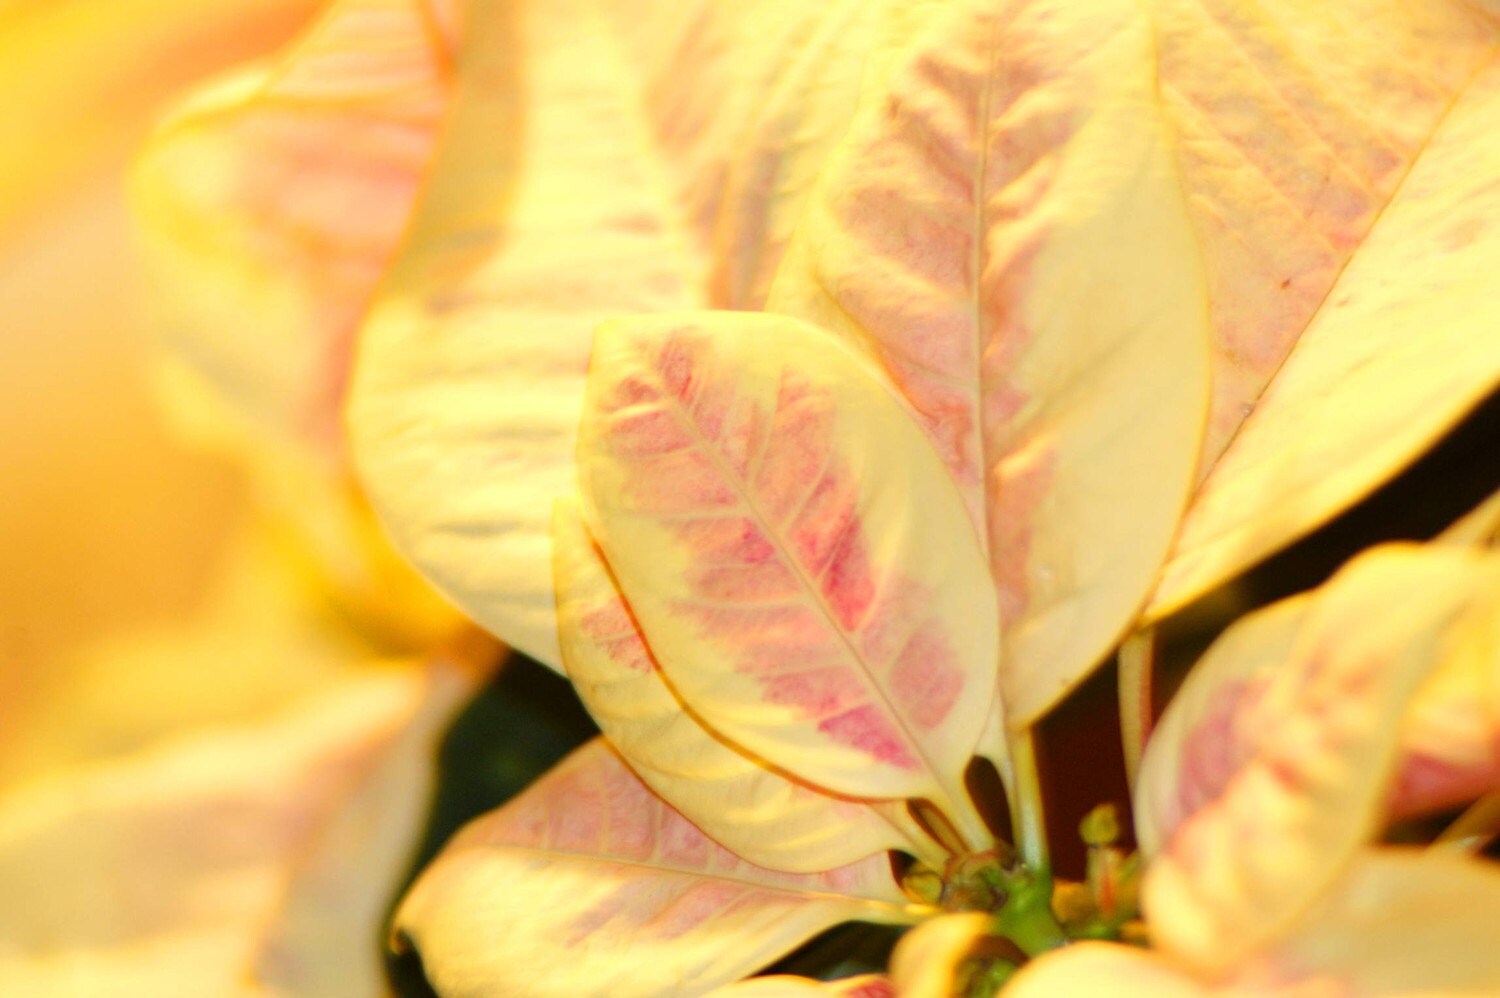
This image was shot using indoor lighting and no flash. Also no support, so the result was a mild blur to the photo! If you don't want any blur use a support or simply edit in your warm cozy effect!
On the flipside, if you want to have a cooler, more wintry snowy effect, you will want to decrease the red or yellow in a photo. This will increase the cyan and blue. There are film and lighting techniques to do this such as adding a filter to your camera, but the cheapest and easiest method again is to create this effect in the editing room!
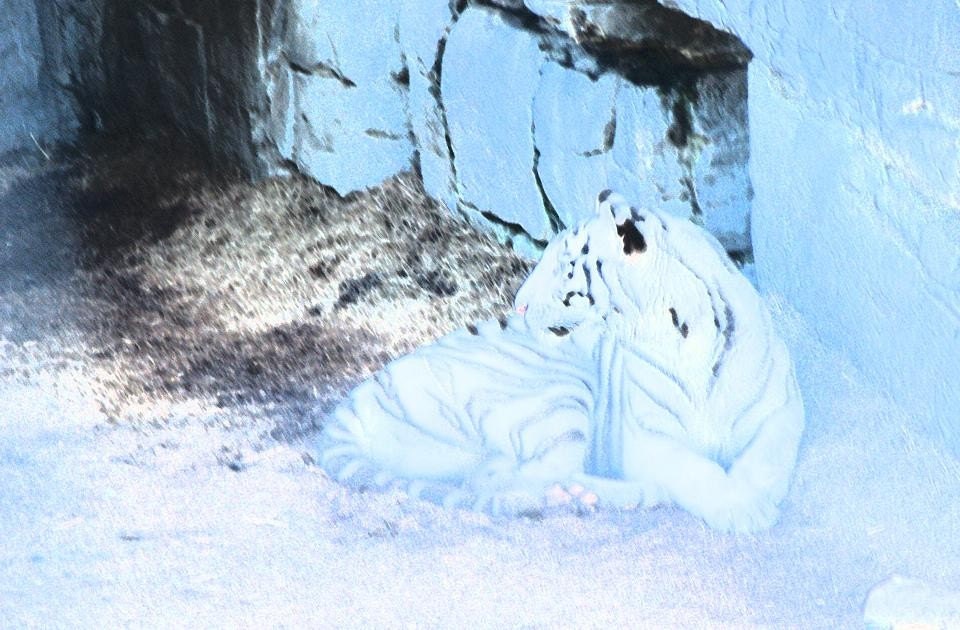
This shot actually utilizes a GIMP filter called smudge-stick which worked with the already cool tones of the photo to create the hazy, cold effect.
Ethereal/magical/innocence: Halo effect! This is one of those special tricks that can actually be easier to accomplish with a little no how during set-up, than with editing! It's all about lighting and angles. To create a glow around your subject the primary source of lighting (ie sun, spotlight, lamp) needs to be behind your subject. You have probably taken enough photos of someone with the sun behind him or her to know that can only be half the trick however! This will result in a backlit photo, with your subject usually darker than the dark side of the moon! You must add in some front lighting! You do not want your front lighting to overwhelm the lighting from behind or you will cancel out the effect. If you are using your camera flash for the front lighting, do not stand too close to the image or the flash will be too strong. If you are using a different light source, make sure it is the weaker or the two. My suggestion for the best bet? Use the sun as your backlighting and your flash as forward lighting.
This technique doesn't just add mystique or innocence to a photo... It can also say BUY ME. As in, *angels sing here* "Finally the scarf you've been looking for!".
One other tip for this lesson: Thick, dark materials absorb light. This means not only do you get hotter in a black wool sweater, it also requires additional lighting to show up as well as your light silky pale green shawl. It's also why I have significantly fewer great snapshots of my beautiful fluffy black cat! When you are taking a photo of something that is a more absorbent color or material it pays to increase the lighting. This also means using a more absorbent material for a backdrop can REALLY make your subject pop by comparison! Absolute contrasts of black and white can be difficult to pull off because of metering and white balance issues so I don't suggest that unless you are experienced, good at editing, or lucky, but less contrasting (ie black and peach, brown and white) will work very well!
Happy shooting! *with your camera!!*
Stay tuned for part 2, and feel free to make requests of special effects hints!